Mountain School @ Home: Lesson 2 – Tree Bud Journal
![]() Students! Parents! Teachers! During this time of school closures and stay-at-home guidelines, North Cascades Institute is sharing lessons and activities from our talented Mountain School instructors. We hope these will inspire students of all ages to continue to learn about the natural world and discover new connections to the outdoors from home. This lesson was created by Mountain School instructor Sarah Meyer. Find more lessons and activities on our blog or website.
Students! Parents! Teachers! During this time of school closures and stay-at-home guidelines, North Cascades Institute is sharing lessons and activities from our talented Mountain School instructors. We hope these will inspire students of all ages to continue to learn about the natural world and discover new connections to the outdoors from home. This lesson was created by Mountain School instructor Sarah Meyer. Find more lessons and activities on our blog or website.
Tree Bud Journals
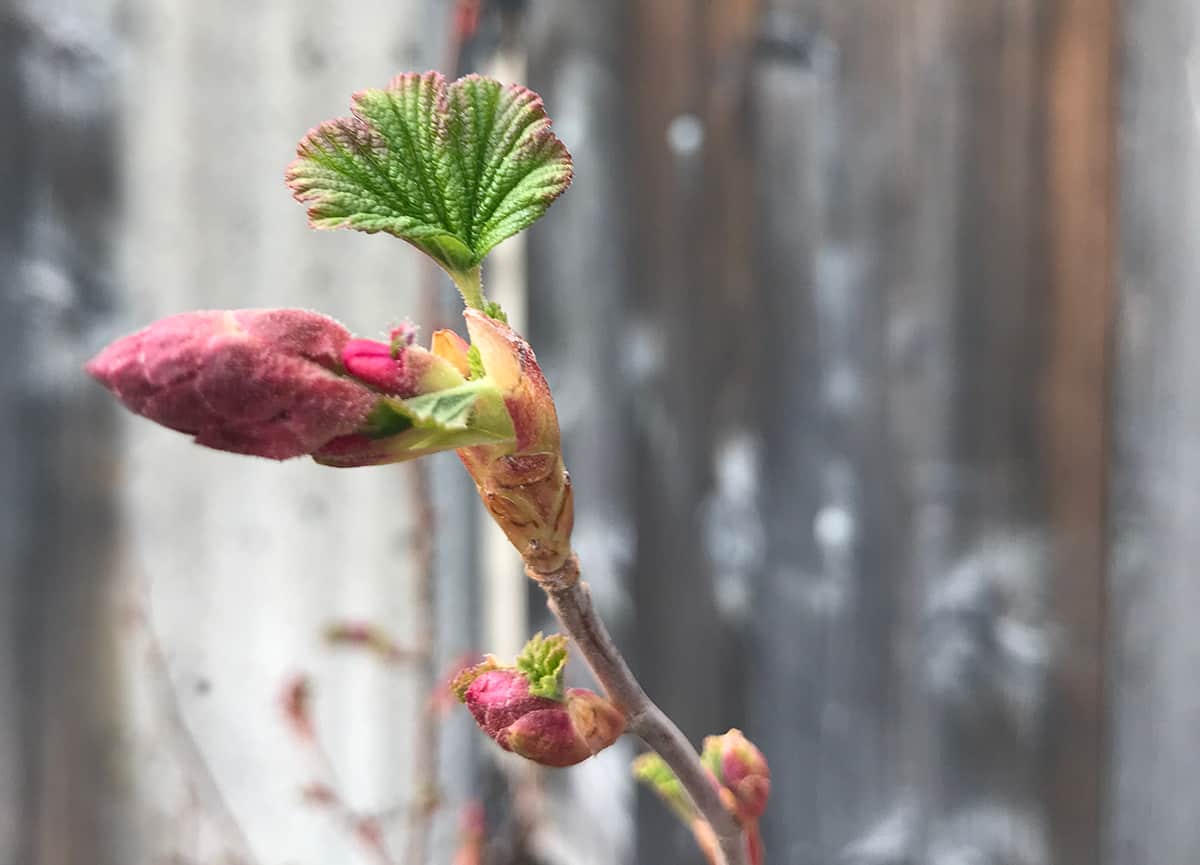
Up here in the Skagit Valley, the songbirds have returned and there are fluffy buds appearing on willow branches along the river. Spring is in the air, and it is the perfect time to investigate up-close one of the most wonderful parts of the year: the leaves returning to our favorite deciduous trees and shrubs!
For this Mountain School @ Home lesson, I’m sharing an ongoing project to do with your young learners over the course of the season, and beyond. Get ready to befriend a tree!
At Mountain School, we love to make observations of all varieties and at all levels of complexity. This multi-week activity is perfect for tuning you and your child’s senses to the changes happening in the natural world–whether you’re in the wilderness or exploring a built environment.
Supplies
Gather together some plain paper, a pencil, drawing/coloring materials, and a short piece of ribbon or brightly-colored string (no more than 10”). You will also need a tree you can visit continually over several weeks.
Choose your tree
For this activity, you and your student will choose a deciduous tree (one that sheds its leaves annually to go dormant for the winter) close to your home. An ideal tree will have a branch hanging low enough for your child to reach and examine up close, and will just be beginning to bud or leaf out. (Neither of you need to be able to identify the tree, but perhaps you will discover its identity as the season progresses!)
Choose one single twig on this branch, no more than a couple inches, and tie a ribbon or brightly-colored string next to it so you remember which bud you are observing–be careful not to disturb the bud’s growth with your string. It will be yours to observe in the coming weeks!
My drawings from my term project are of Quercus robur, English Oak; your tree does not need to be a native species. Any tree near your home will do. Start soon—buds are bursting open left and right!
Crafting your Tree Bud Journal
It should have at least ten pages of blank paper, and should be at least 4 x 6 inches. Computer paper folded in half and stapled works great.
Start your observations
Plan to spend at least 15 minutes with the tree bud, or as long as necessary to get a good sketch. Start by making observations about your bud together: “I notice…. I wonder…. It reminds me of…..” and have your student write down some observations in their journal. Is this bud different from other buds on the tree? Do you have any predictions for how the position of this bud low-down on the tree will affect its growth? Write it all down!
Next, work with your student to draw the bud as accurately as they can. If the bud has scales, draw the scales. If the bud is pointy, make sure the drawing is pointy. Don’t forget to label what you observe! It doesn’t have to be perfect; the exercise of drawing what one sees is in itself a valuable observational tool.
Once the field sketch is done, you and your student can finish up the color portion of the drawing at home–feel free to take a photo or two for reference. (Personally, I had an easier time making my drawing more true to form by sketching a final draft from a photo).
Keep it going!
- Visit your tree bud once a week for the next several weeks to make observations about its progress, and to draw a new picture.
- Try to visit on the same day each week.
- Keep track of the changes you see in the journal: is anything missing that was there last week? Is there something new this week? How are the colors different? Is this bud different from buds higher up on the tree? Why is that? What about other trees nearby?
There is no need to use scientific plant morphology terms in these observations, but if your student is looking to up the ante, there are websites galore with information, including this fun interactive tree ID guide from the Arbor Day Foundation.
As the season goes on, send us pictures of your student’s journal to info@ncascades.org! We would love to hear about the observations of spring growth you and your student make in your home environment.
Author’s note: I did this as a term project five years ago during a college course called Trees Across Oregon, and credit goes to Whitey Lueck at University of Oregon for this delightful investigation into annual growth. I have never learned so much about the way deciduous trees grow as I did during this exercise!
Thank you for helping us offer these at-home lessons for transformative learning experiences in nature by making a gift at www.ncascades.org/give.